Hello Bar

Friday, September 16, 2011

Two Heads Are Better Than One


In this easy GIMP exercise you'll combine two images together into a nice, blended single image with two views of the same subject.

2h00.png

Some of the things you will do in this lesson:

  • Create a new image of a specific size
  • Select and copy an entire image
  • Paste a new layer from the clipboard
  • Use a layer mask with the Blend Tool

First, grab the two source images by Annika Banfield from stock.xchng:

Image A | Image B

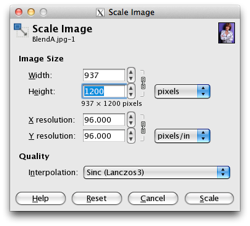
These images will be very large, so the first task is to resize the two images to a smaller easier-to-work-with size, but more importantly, so that both images are the same height, Image > Scale Image… . I resized both to have a height of 1200 pixels,
2h01.png

Create a new image, File > New…, with the same height (1200 pixels) and a width approximately equal to the sum of the widths of the two source images (2300 pixels).
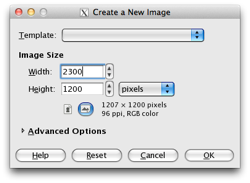
2h02.png

Select all of Image B, Select > All (or Ctrl+A). and copy it, Edit > Copy (Ctrl+C). Paste it onto the new image as a new layer, Edit > Paste as > New Layer. It will appear as a new layer named Clipboard. Rename it as Layer B. Use the Move Tool to position Layer B a bit right of center in the new image.

Repeat this process with Image A, naming this layer Layer A. Position Layer A a bit left of center in the new image, overlapping Layer B.
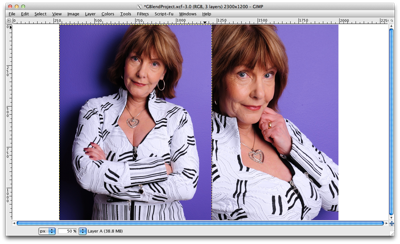
2h03-1.png

Add a white (full opacity) layer mask to Layer A, Layer > Mask > Add Layer Mask (or right-click Layer A in the Layers pallet).
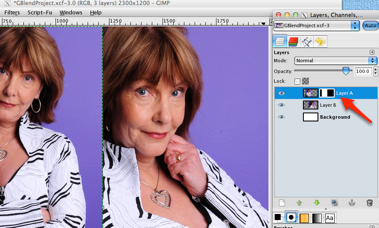
2h04-1.png

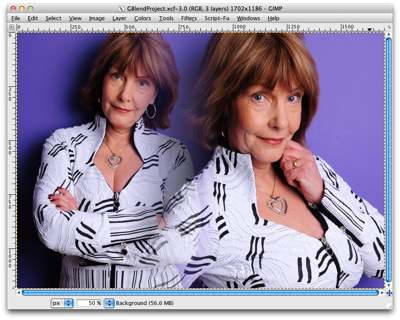
Select the Blend Tool from the Tools pallet, and choose the foreground-to-background (default colors) linear gradient in the Tool settings. Click and drag the cursor horizontally from the right edge of Layer A to gradually fade in the overlapping portion (to about the middle of Layer A).
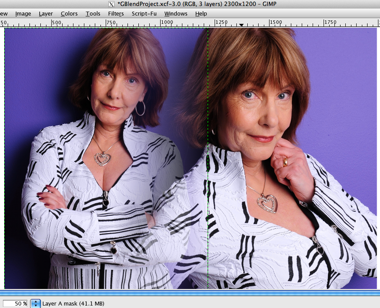
2h05.png

See a video showing how to do this.

Finally, with the Crop Tool, remove the excess background area of the image. You now should have a nicely blended image combining two portraits of the model.
2h06.png

I'm going to apply each of two different effects to Layer A as possible extensions to this project. (Be sure Layer A is the active layer in the Layers pallet before applying any of these effects.)

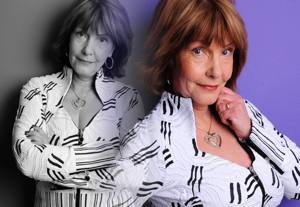
Desaturate Layer A
2h07.png

Remove the color from Layer A, Colors > Desaturate.

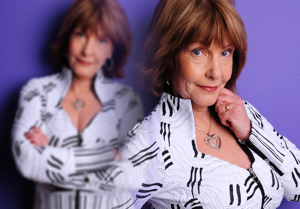
Blur Layer A
2h08.png

Add a Gaussian blur to Layer A, Filter > Blur > Gaussian…, with a Radius of about 20.

Be bold and creative, experiment with as many effects and filters as you like.


Sunday, July 17, 2011

In the Spotlight

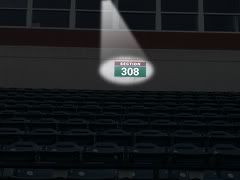
In this brief lesson, you will learn a method to use GIMP to highlight a target in a photo by shining a simulated spotlight on it.

Sec308Spotlight-sml.jpg

Some of the things you will do in this tutorial:

  • Make a selection using the Path Tool
  • Feather a selection
  • Apply a Gaussian blur
  • Add a Layer Mask
  • Use the Blend Tool to apply a gradient

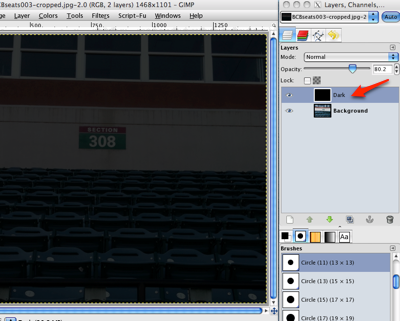
Open the image to which you want to add the spotlight effect. Create a new layer named Dark, Layer > New Layer... . Use the Bucket Fill Tool to paint the Dark layer black. Adjust the opacity to about 80-90%.

spot01.png

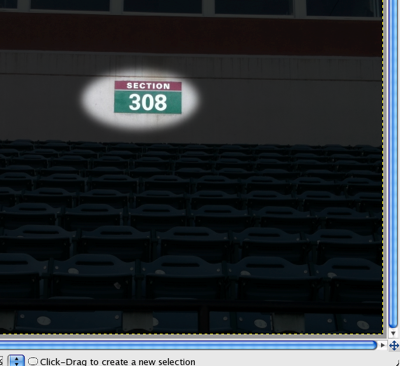
With the Ellipse Select Tool, select an oval around the target of the spotlight on the Dark layer. Feather the selection about 40 pixels, Select > Feather... , and clear the selection, Edit > Clear. Deselect.

spot02.png

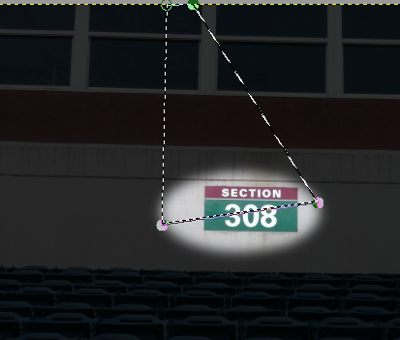
Now, using the Path Tool, make a polygonal (almost triangular) selection to simulate the beam of the spotlight. Note that you need only draw three sides of the path. When you click on the Selection from Path button in the Tool Options the final side will be drawn automatically.

spot03.png

mmenuvideooff.gif

See this in a video.


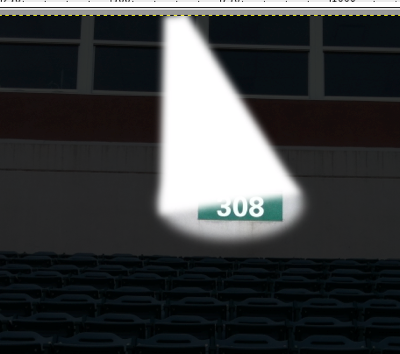
Create a new layer, Beam, and fill the selection on the Beam layer with white using the Bucket Fill Tool. Deselect. Apply a  Gaussian blur with a radius of 25, Filters > Blur > Gaussian... .

spot04.png

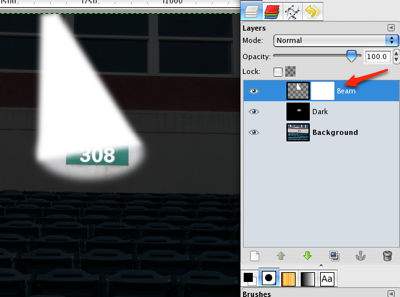
Add a mask to the Beam layer, Layer > Mask > Add Layer Mask... .

spot05.png

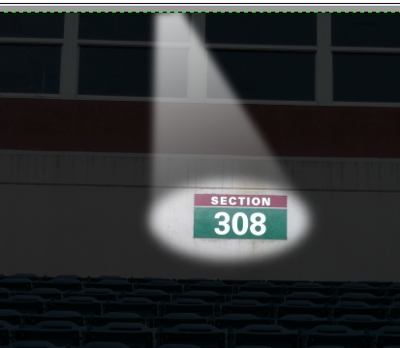
Apply a FG to BG (black-to-white) gradient to the mask with the Blend Tool from the target to the light source.
mmenuvideooff.gif

See how to do this in a video.
 

Slide the layer's opacity down to about 80%.

spot06.png

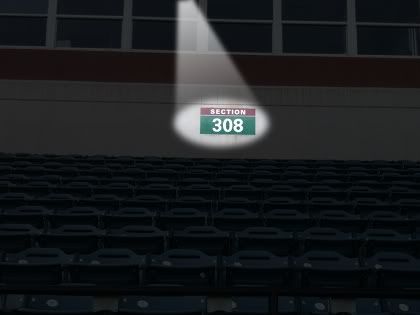
There you have it!

Sec308Spotlight.jpg

Thursday, July 7, 2011

Let There Be Light

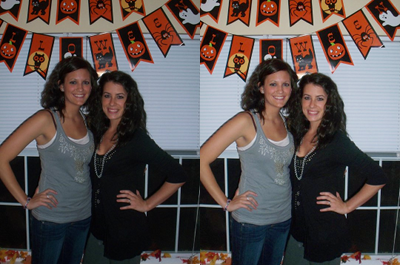
In this short and easy tutorial you will learn how to quickly add some light to those underexposed photos we so often get from cameras in phones.

liteb4After.png

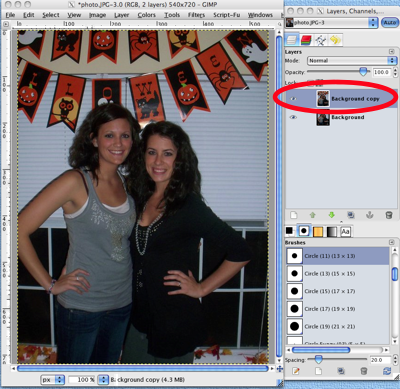
First, create a duplicate layer of the photo, Layer > Duplicate Layer.

lite01.png

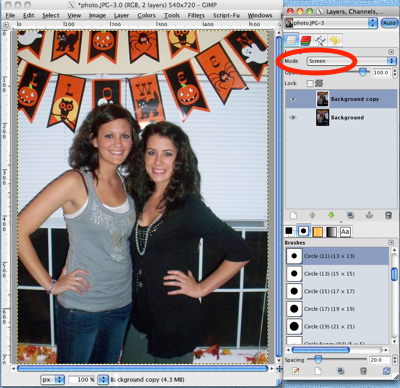
In the Layers pallet, set the Mode of the duplicate layer to Screen.

lite02.png

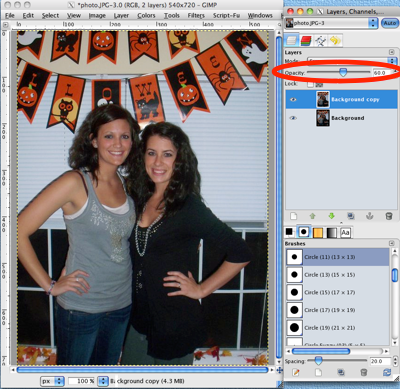
Slide down the Opacity to the desired level of brightness. I used 60%.

lite03.png

That's all there is to enhancing your photo!

Sunday, May 29, 2011

Stick It To Me: Create an adhesive bandage from scratch

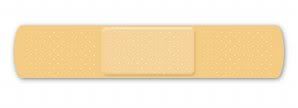
In this three-part tutorial you'll learn how to use GIMP to create a realistic looking adhesive bandage.

band-aid-tut-sml.jpg

Some of the things you will do in this exercise:

  • Change layer mode
  • Merge layers
  • Open an image as a new layer
  • Crop a layer to a selection
  • Apply layer effects*

PART 1Create the main body of the bandage.

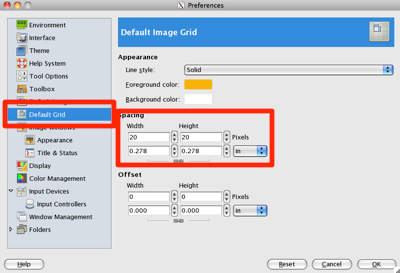
Before beginning, in the Preferences panel (Edit > Preferences), set the default grid spacing to 20 pixels.

ba01.png

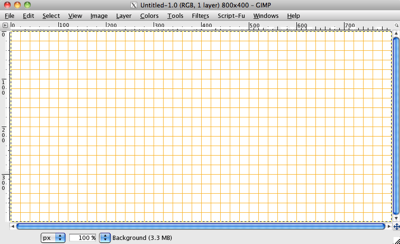
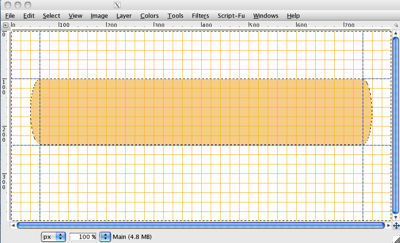
Create a new file, File > New... 800x400, and display the grid, View > Show Grid.

ba02.png

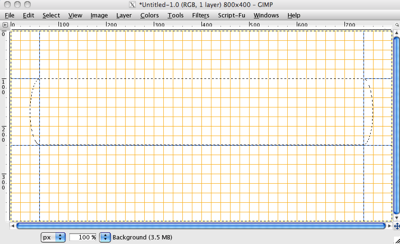
From the left ruler, drag out vertical guides to 60 and 740 pixels. From the top, drag down horizontal guides to 240 and 100 pixels.

Rectangle Select Tool select a rectangle about 680 x 140 pixels bounded by the guides. With the Ellipse Select Tool in "Add to the current selection mode" add curves to the ends of the rectangular selection.

ba03.png

mmenuvideooff.gif

See a video showing how to do this


Add a new transparent layer, Main. Set the FG color to something like a flesh tone, I used f4cc85, and fill the selection on the Main layer using the Bucket Fill Tool.

ba04.png

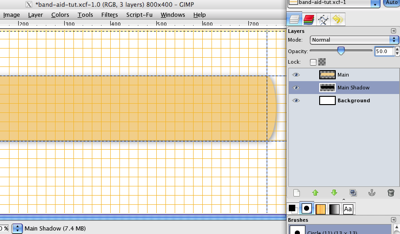
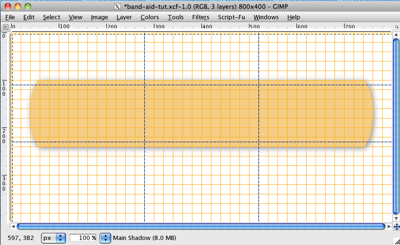
Add a new transparent layer, Main Shadow, reset the default colors, and fill the selection on this layer with black. Remove the selection. Blur this layer, Filters > Blur > Gaussian Blur…‚ with a Blur Radius of 20. In the Layers pallet drag the Main Shadow layer under the Main layer. With the Move Tool, reposition this layer down and to the right for a shadow effect. Turn the opacity down to about 50.

ba05.png


PART 2Make the pad portion of the bandage.

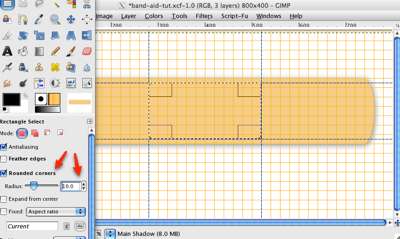
Using the Move Tool, drag the vertical guides to 280 and 520 pixels. Drag the horizontal guides to 110 and 230 pixels.

ba06.png

Choose the Rectangle Select Tool and in the tool settings check Rounded corners with a radius of 10. Now using the guides make the selection for the pad.

ba07.png

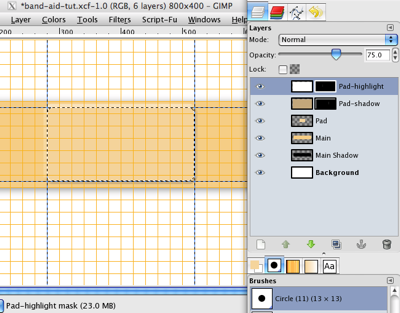
Make a new layer, Pad, on top of all the other layers. Choose a slightly lighter flesh tone to fill the selection on the Pad layer. I used f5d39b.

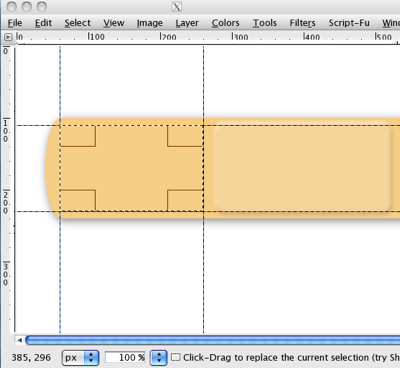
Next, give the pad area a raised effect using Script-Fu > Layer Effects > Bevel and Emboss…‚ set the Shadow Color to a darker flesh tone, my choice was c2a77b, and keep the other default settings.

Remove the selection. Merge the Pad-highlight and Pad-shadow layers and apply a Gaussian Blur with radius 5.

ba08.png


PART 3Apply the perforations.

You will need to download this image of dots on a transparent background or find one of your own.

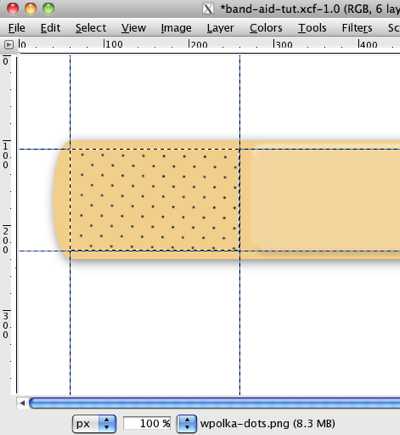
Move your vertical guides to 60 and 260 and use them to make a rectangular selection on the left end of the bandage.

ba10.png

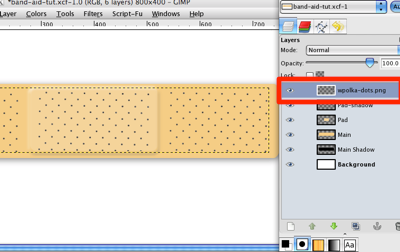
Open the downloaded file wpolka-dots.png as a new layer, File > Open as Layers… . Position the dots layer to fill the rectangular selection. Then crop the layer to the selection, Layer > Crop to Selection. (NOTE: Moving the dots layers can be a little tricky as you have to precisely grab one of the dots in the image.)

ba11.png

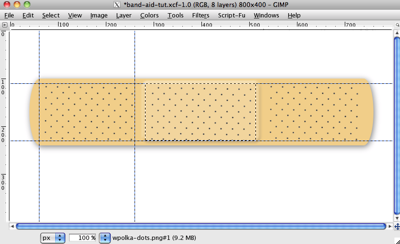
Duplicate this layer and drag the copy to the right end of the bandage. Next, select a rectangle that covers the pad area and again open the wpolka-dots.png as a new layer, position it, and crop it to the selection as done earlier.

ba12.png

Remove all selections and  drag off all the guides. Merge all the polka dot layers into a single layer.

ba13.png

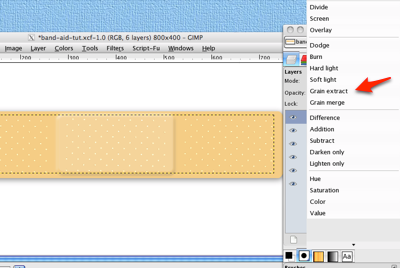
Be sure that's the active layer. Change the Layer Mode to Grain Extract.

ba14.png

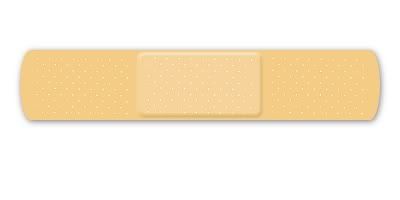
And you should be right here ...

band-aid-tut.jpg

*If you do not have the Layer Effects plug-in installed, go here.

How many times you'll ever need to create an adhesive bandage from scratch, I can't guess. However, I hope is that you learned a few new skills and how to apply them in other image work.

Sunday, April 3, 2011

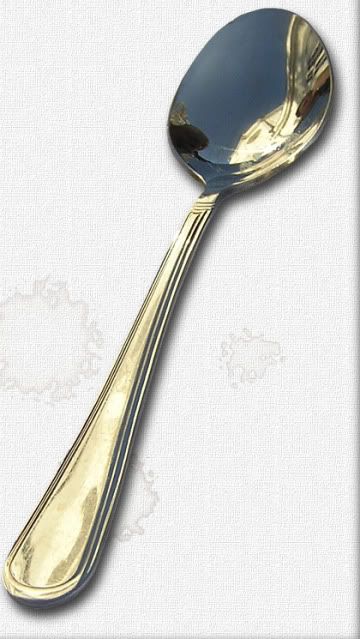
Silver Spoon

Although GIMP has a good filter for easy drop shadow creation, it is good to know how to build your own shadows when you want something just a bit better. Plus, some of the techniques in this lesson have a number of other applications.

spoon-tut-sml.jpg

Things you will do in this exercise:

  • Add an alpha channel (transparency) to a JPG image
  • Make a selection by color and refine that selection
  • Add and move layers
  • Use the Apply Canvas and Coffee Stain filters

You can get the image of the spoon that I used here or use one of your own.

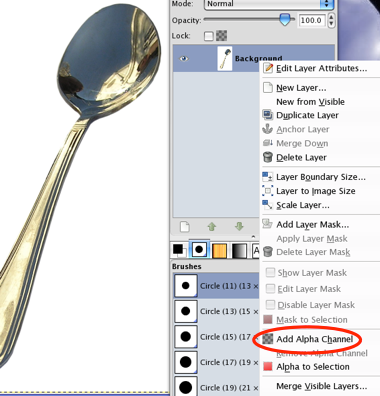
The initial task is to replace the background with transparency. Because this picture has a simple white background, that will be fairly easy. First, however, you need to add an alpha channel to the jpg image. In the Layers pallet, right-click the background layer and select Add Alpha Channel.

sp01.png

From the Toolbox choose the Select by Color tool and click anywhere in the white area, drag the cursor to get the best selection. You may need to use the Quick Mask to make a few touch ups to the selection.

spn02.png

videoicon.png

See how to do this in a short video

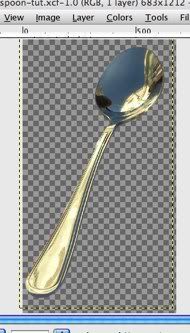
Grow the selection by about 2 pixels, Select > Grow... , and feather it by about 2 pixels to soften the edge, Select > Feather... . Now remove the white background, Edit > Clear.

spn03.jpg

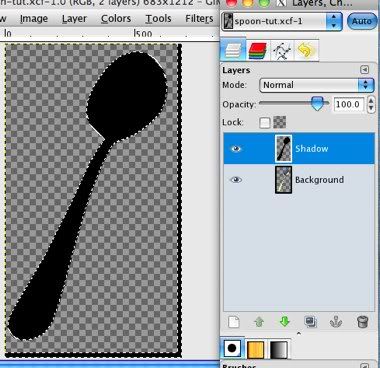
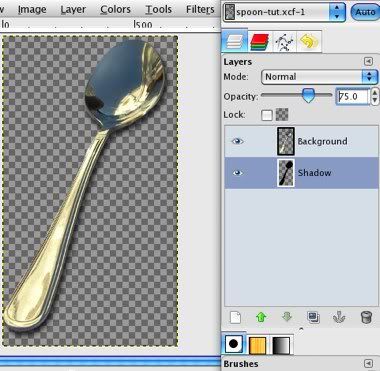
Add a new layer named Shadow and invert the selection, Select > Invert. Fill the selection on the Shadow layer with the foreground color (black), Edit > Fill with FG Color. Deselect.

spn04-1.jpg

Apply a Gaussian blur of about 30 to the Shadow layer, Filter > Blur > Gaussian Blur... .

In the Layers pallet, drag the Shadow layer under the Background layer. Use the Move tool to offset the Background and Shadow layers. Reduce the opacity of the Shadow layer to get a soft shadow effect, about 70-75.

spn05.jpg

You now have a nice drop shadow for your spoon. Next we're going to put a coffee-stained table cloth under the spoon.

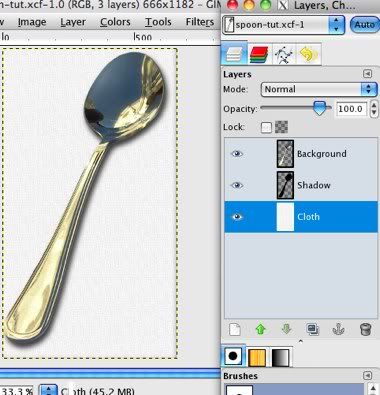
Add a new white layer named Cloth. Be sure it is the bottom layer in the stack. Apply some texture to the Cloth layer, Filters > Artistic > Apply Canvas… and set the direction to match the light source of your shadow, in this exercise, Top Left.

spn06.jpg

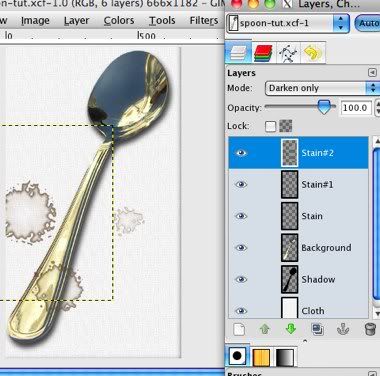
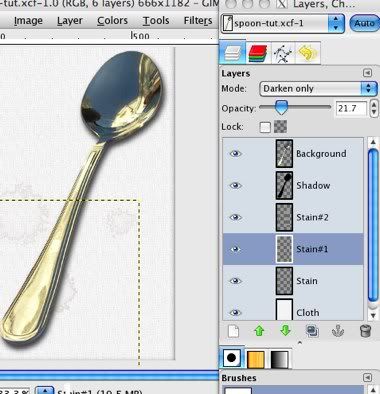
Next, using the Decor filter, we'll add a coffee stain to the table cloth, Filters > Decor > Coffee Stain…, I used the default settings. GIMP will generate each stain on a separate layer.

spn07.jpg

Move all the stain layers between the Shadow and Cloth layers, and reduce the opacity of each stain layer down to about 20 or less.

spn08.jpg

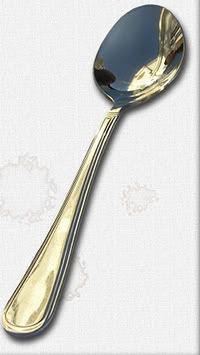
The finished project:

spoon-tut.jpg