Although GIMP has a good filter for easy drop shadow creation, it is good to know how to build your own shadows when you want something just a bit better. Plus, some of the techniques in this lesson have a number of other applications.

Things you will do in this exercise:
- Add an alpha channel (transparency) to a JPG image
- Make a selection by color and refine that selection
- Add and move layers
- Use the Apply Canvas and Coffee Stain filters
You can get the image of the spoon that I used here or use one of your own.
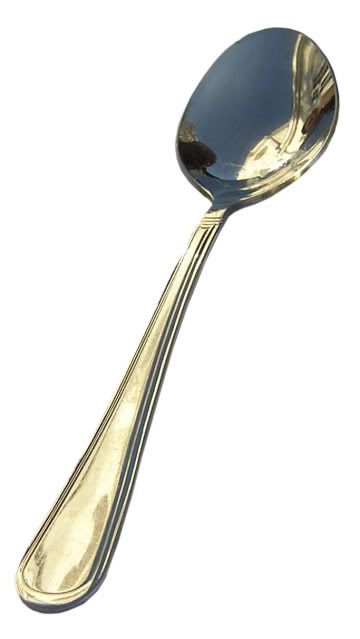
The initial task is to replace the background with transparency. Because this picture has a simple white background, that will be fairly easy. First, however, you need to add an alpha channel to the jpg image. In the Layers pallet, right-click the background layer and select Add Alpha Channel.

From the Toolbox choose the Select by Color tool and click anywhere in the white area, drag the cursor to get the best selection. You may need to use the Quick Mask to make a few touch ups to the selection.


See how to do this in a short video
Grow the selection by about 2 pixels, Select > Grow... , and feather it by about 2 pixels to soften the edge, Select > Feather... . Now remove the white background, Edit > Clear.

Add a new layer named Shadow and invert the selection, Select > Invert. Fill the selection on the Shadow layer with the foreground color (black), Edit > Fill with FG Color. Deselect.

Apply a Gaussian blur of about 30 to the Shadow layer, Filter > Blur > Gaussian Blur... .
In the Layers pallet, drag the Shadow layer under the Background layer. Use the Move tool to offset the Background and Shadow layers. Reduce the opacity of the Shadow layer to get a soft shadow effect, about 70-75.

You now have a nice drop shadow for your spoon. Next we're going to put a coffee-stained table cloth under the spoon.
Add a new white layer named Cloth. Be sure it is the bottom layer in the stack. Apply some texture to the Cloth layer, Filters > Artistic > Apply Canvas… and set the direction to match the light source of your shadow, in this exercise, Top Left.

Next, using the Decor filter, we'll add a coffee stain to the table cloth, Filters > Decor > Coffee Stain…, I used the default settings. GIMP will generate each stain on a separate layer.

Move all the stain layers between the Shadow and Cloth layers, and reduce the opacity of each stain layer down to about 20 or less.

The finished project:
