Blending Two Images with GIMP has been by far the most popular tutorial I have ever posted. However, it is 5 years old and much in need of updating to reflect the many improvements made in GIMP in that time. Following is an updated tutorial using GIMP 2.8.

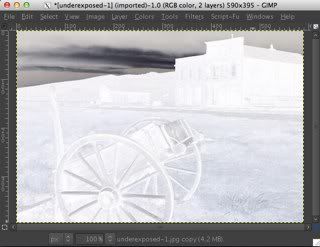
Select two pictures you want to blend. Choose one to use as the base image and open that one. Name it Base.

Next, you will need to increase the canvas size, Image>Canvas Size..., of this image to accommodate pasting in the other image. In this example, I increased the width of the canvas to 200%, but kept the height the same. In the canvas size dialog, slide the existing image all the way to the left on the canvas. Later you can crop out any unused transparent area.

Open the other image as a new layer in the base image, File>Open As Layers... . Name it Top.

With the Move Tool, position the Top layer so that it overlaps the Base layer an appropriate amount.
Temporarily hide the Top layer by clicking the
 in the Layers pallet. Drag a vertical guide out from the ruler on the left to mark the right edge of the Base layer.
Make the Top layer visible again, by clicking the
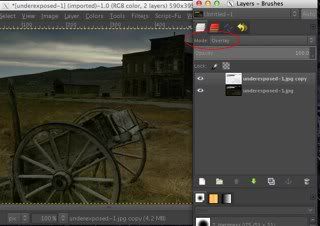
 . Add a layer mask to the Top layer. In the Layers palette, right-click the Top layer and select Add Layer Mask…, select White (full opacity).
Be sure the color swatches are set to the default colors. With the Blend Tool paint a FG-to-BG gradient on the layer mask by drawing a horizontal line from the middle to the right edge of the overlapping area.

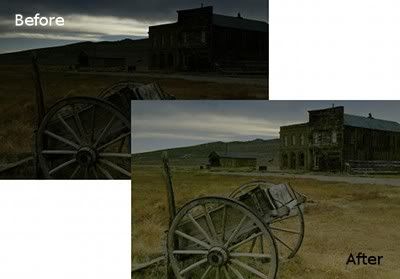
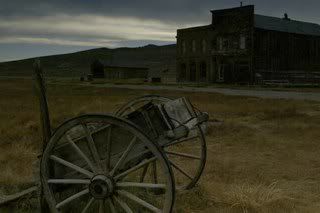
The two images should now be blended together as shown.

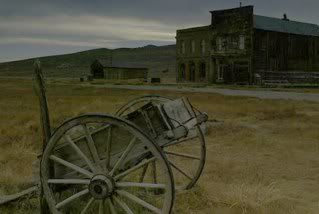
Finish up by flattening the blended images into a single layer, Image>Flatten Image. Use the Crop Tool to remove any unwanted portions of the image.

This is a simple procedure to blend two images. There are many other things you can do to further enhance the image, but those are not the subject of this tutorial.